Even in the simplest of photographs, it can sometimes be the smallest of details that make a very big difference to the overall effect. Take this straightforward picture of the Remembrance Day poppies in our village church, for instance. This is going to be a bit of a ‘spot the difference’ test.
Flare from the window
The ladies of our ancient village church have been knitting poppies in preparation for Remembrance Sunday for months. The bright red woollen poppies are used each year to decorate the church for the service. It all looks very beautiful. Such a tragedy that this year, due to ‘lockdown’ there will be no full service in church. Still, individual visitors will be able to go into the church to ‘Remember Them’.
I was given the task of photographing the poppy-decorated church for our village website. The first problem was the sheer brightness of that huge window behind the altar. The light flared into the lens so badly, that I gave up and went back as the light was fading.
The plan was to use a long time exposure while firing a couple of manual hand-held flash units. A method that goes back to Victorian times. But that’s not what this little post is about. Here I want to illustrate just how important it is to notice the details within your picture and be prepared to change things in order to achieve the image you want.
Notice the detail
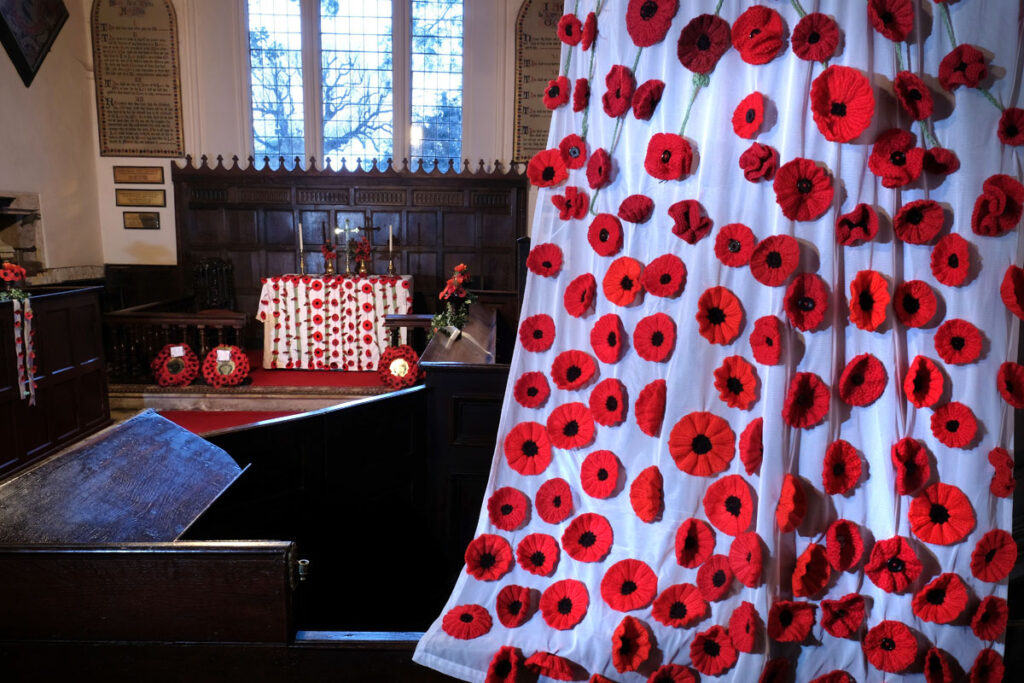
With the light fading outside, I was free to shoot into that large window without getting flare. I positioned the camera on my tripod high up near the decorated pulpit. This was to give a bold foreground of red poppies against the white sheet. The decorated altar was some way away so I used a wide-angle lens and stopped down to f/16 to get lots of depth of field.
With a shutter speed of over 6 secs, I had lots of time to open the shutter and fire the flashes. One flash I held to illuminate the foreground, the other my wife held out of shot to the left. Her job was to point the flash at the altar and fire her flash as soon as mine went off.
I got one shot in the bag as a test and gave it some close scrutiny. It was obvious that the large area of wooden lecturn on the left of the picture – hardly noticable and very dark until the flash was fired – then looked empty and uninteresting.
Beneath the pulpit I found a large bible, opened it and put that on the lectern. A real perfectionist might have chosen the page very carefully for its text, I chose a page that was photogentic!
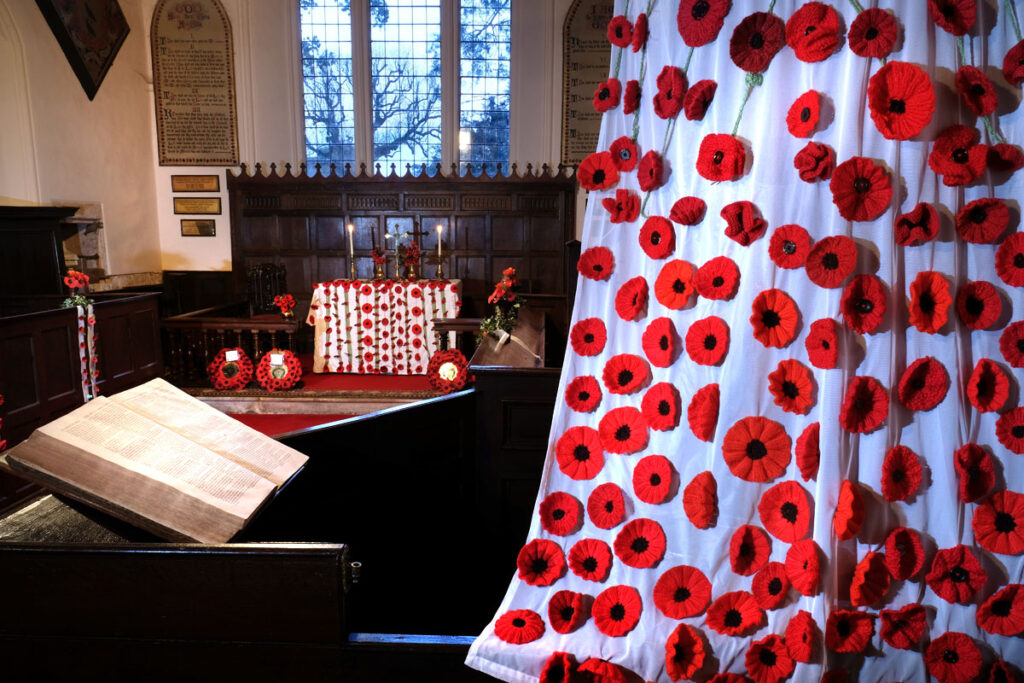
I took another shot and took a good look at that.
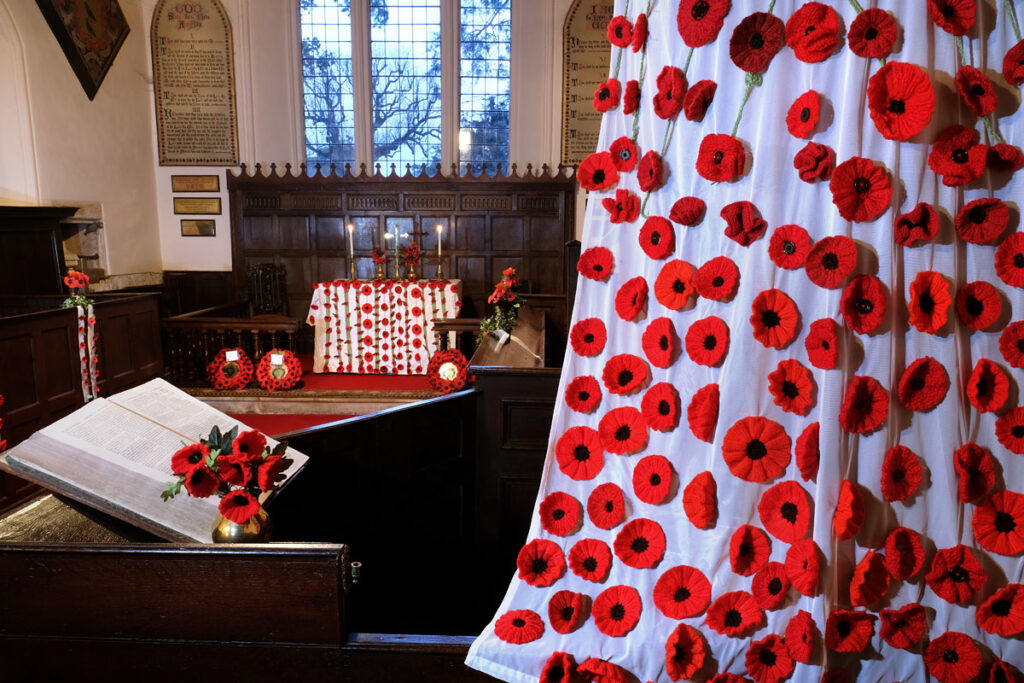
Just one more adjustment needed. Now the open bible needed something to break the expanse of the page. If you look carefully at the first picture I took, you will see a small vase of red poppies on the rail in front of the altar. I moved this onto the lectern to break the visual line of the bible and add interest and colour.
Check your picture
If you are working on static subjects like this, there is not much excuse for getting things wrong. With a modern digital camera, you have time to check your images at each stage. A luxury that was never available to us when we used film. So use it, and make any small improvements needed until you get the composition you are looking for.
We Will Remember Them